Stain Removal in Burnt Oak: A Practical, SEO-Friendly Approach to Restoring Rich Wood Finishes
Burnt oak is admired for its deep tones, dramatic grain, and timeless character. Whether it appears on furniture, flooring, cabinetry, paneling, or decorative accents, this finish can make a room feel warm and refined. Yet its beauty also means it can be vulnerable to marks, spills, water rings, grease spots, and discoloration. That is why stain removal in burnt oak matters so much for homeowners, property managers, and restoration professionals alike.
When a stain appears on burnt oak, the first reaction is often panic. Many people worry that the dark finish has been permanently damaged. In reality, stain removal in burnt oak is often possible with the right method, the right product, and a careful understanding of how the wood surface was treated. The key is to act quickly, avoid harsh shortcuts, and use techniques that protect the underlying grain and finish.
This article explains practical methods for stain removal in burnt oak, the differences between surface stains and deeper discoloration, and the best ways to prevent future damage. It also covers safe cleaning products, common mistakes, and when it may be time to seek professional help. If you want your woodwork to keep its rich, elegant appearance, the following information will help you make smart decisions and maintain lasting results.
Understanding Burnt Oak and Why It Stains Differently

Burnt oak is not always a separate species of wood; it often refers to oak that has been darkened, heat-treated, smoked, stained, or finished to achieve a deeper color. Because of this process, stain removal in burnt oak can be more delicate than cleaning lighter, unfinished wood. A darkened finish may hide some marks, but it can also reveal scratches, dull spots, and chemical reactions more easily.
The surface you are cleaning could be sealed with varnish, lacquer, polyurethane, oil, wax, or a specialized tinted finish. Each of these coatings responds differently to moisture, abrasives, and solvents. That is why effective stain removal in burnt oak starts with identifying the finish before attempting any treatment. If you know what you are dealing with, you are far less likely to worsen the damage.
Another reason burnt oak stains require care is contrast. A pale water ring on a dark surface can be highly visible, while a grease mark may create a shiny patch that stands out under light. In many cases, the issue is not only the stain itself but also the way it disrupts the surrounding sheen. Careful stain removal in burnt oak often means restoring uniformity, not just lifting the mark.
Common stain types you may see on burnt oak
- Water rings from glasses, plants, or condensation
- Grease and oil spots from food, hands, or cleaning products
- Ink or dye transfer from pens, clothing, or decor items
- Heat marks from hot cookware or appliances
- Food stains from sauces, wine, coffee, or fruit juice
- Wax or polish buildup that creates cloudy patches
First Steps Before Stain Removal in Burnt Oak
Before you begin any stain removal in burnt oak process, take a few minutes to inspect the surface closely. Look for scratches, peeling finish, soft spots, or areas where the stain may already have penetrated the wood. If the damage seems deep, aggressive scrubbing is not the answer. A slower, more controlled method is usually safer and more successful.
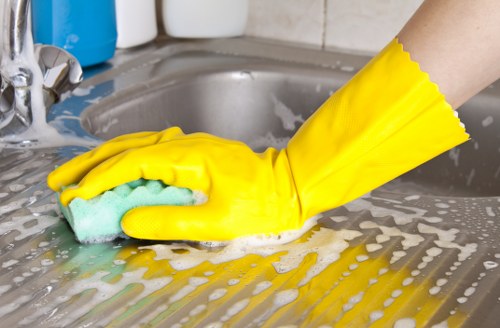
Start with dry cleaning. Use a soft microfiber cloth or a clean cotton cloth to remove dust, grit, and loose residue. This matters because loose particles can act like sandpaper during cleaning. For many people, the first visible improvement in stain removal in burnt oak comes simply from removing surface debris and old polish buildup.
Always test any cleaning product in an inconspicuous area first. This is one of the most important rules in stain removal in burnt oak. Even gentle cleaners can alter the sheen, lighten the finish, or leave a dull patch. A quick spot test protects the visible parts of your furniture, floor, or cabinetry from avoidable damage.
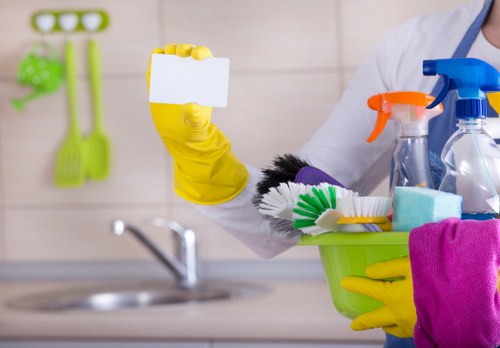
Tools and supplies that are often useful
- Microfiber cloths
- Soft cotton cloths
- Distilled water
- Mild dish soap
- Baking soda
- White vinegar
- Wood-safe cleaner
- Non-abrasive sponge
- Soft-bristle toothbrush for tiny edges
- Furniture wax or polish, if appropriate for the finish
Safe Methods for Surface Stain Removal in Burnt Oak

For surface-level marks, the safest stain removal in burnt oak method usually begins with mild cleaning. Mix a small amount of gentle dish soap into distilled water, dampen a cloth lightly, and wipe the area without soaking it. Then dry immediately with another soft cloth. The goal is to lift residue without letting moisture seep into the wood or softening the finish.
If the stain remains, try a paste made from baking soda and a few drops of water. Apply it gently, rub in the direction of the grain, and avoid excessive pressure. Baking soda can help with light discoloration, especially on greasy or oily marks. However, in stain removal in burnt oak, less is more. You want controlled action, not aggressive abrasion.
For water-based stains, a slightly damp cloth with a small amount of white vinegar may be effective, especially on a sealed surface. Vinegar can help break down mineral deposits and light cloudiness. Still, it should be used sparingly and never left sitting. In the context of stain removal in burnt oak, any acidic solution should be treated with caution because prolonged exposure can dull certain finishes.
Quick steps for mild surface stains
- Dust the area thoroughly.
- Mix a gentle cleaning solution.
- Test on a hidden spot.
- Wipe lightly with the grain.
- Dry immediately and inspect the result.
- Repeat only if needed, using minimal moisture.
Tackling Deeper Marks and Discoloration
Some stains on burnt oak are not just on the surface; they are absorbed into the finish or even into the wood fibers. In these cases, stain removal in burnt oak becomes a more nuanced process. The first question is whether the discoloration is caused by a stain, a damaged finish, or a chemical reaction. That distinction matters because each problem requires a different remedy.
Heat marks, for example, often create white or cloudy rings on a finished surface. These may respond to gentle warming methods, such as using a hair dryer on a low setting at a safe distance, but only when the finish is known to be stable. On the other hand, black or dark stains may indicate moisture penetration or oxidation. Effective stain removal in burnt oak may then require refinishing rather than simple cleaning.
If the mark has soaked in, a wood bleach or oxalic acid treatment may sometimes help, but this is not a casual first choice. Such products can alter the tone of the wood and should be handled carefully. In professional stain removal in burnt oak, specialists often evaluate the stain type before deciding whether to lighten, blend, or refinish the surface entirely.
When a stain is deeper than the finish
- The mark does not change after cleaning.
- The stain has a shadow-like outline.
- The finish looks intact, but the wood is discolored underneath.
- There is a raised or warped area from water damage.
- The surrounding area is dull, but the stain is still visible.
At this stage, spot restoration may involve lightly sanding the affected area, matching the stain color, and resealing it. Because burnt oak is dark and visually rich, color matching is extremely important. A poorly matched repair can stand out more than the original stain itself. That is why careful stain removal in burnt oak should always prioritize blending and finish harmony.
Best Practices for Different Burnt Oak Surfaces

Not all burnt oak surfaces are the same. What works for a coffee table may not be appropriate for kitchen cabinets or flooring. Successful stain removal in burnt oak depends on the item’s use, finish, and exposure level. A vertical surface may need less moisture than a horizontal one, while a floor will need more durable care than a decorative shelf.
For burnt oak furniture, the focus is usually on preserving the sheen and avoiding scratches. Soft cloths, mild soap, and furniture-safe polish are often enough for light marks. For burnt oak flooring, quick cleanup is essential because spills can seep into joints and edges. In flooring, stain removal in burnt oak often includes careful drying, spot treatment, and possibly refinishing damaged boards.
For burnt oak cabinets and paneling, grease buildup is a common issue, especially in kitchens. A diluted degreasing solution can help, but it should be used gently and wiped away thoroughly. In these areas, stain removal in burnt oak is as much about routine maintenance as it is about emergency cleaning. Regular attention prevents stains from becoming permanent.
Surface-specific recommendations
- Furniture: Use soft cloths and avoid soaking the surface.
- Floors: Clean spills quickly and avoid standing water.
- Cabinets: Focus on grease removal and finish-safe cleaners.
- Paneling: Dust often and treat marks with minimal moisture.
- Decorative accents: Handle gently and test every product first.
Common Mistakes to Avoid During Stain Removal in Burnt Oak
People often assume that stronger products mean better results, but that is rarely true. One of the biggest mistakes in stain removal in burnt oak is using too much water. Excess moisture can seep into seams, cause swelling, and weaken the finish. Another mistake is scrubbing with abrasive pads, which can scratch the surface and create permanent dullness.
It is also a mistake to use multiple chemicals at once. Mixing vinegar, bleach, ammonia, or solvent-based cleaners can damage the finish and create unsafe fumes. In stain removal in burnt oak, a safer approach is to use one method at a time and allow enough time to evaluate the result. Patience often produces better outcomes than repeated harsh treatment.
Another common issue is failing to dry the surface properly. Even when a cleaner works, leftover moisture can leave rings or encourage further discoloration. After any cleaning step, buff the area gently and let it air dry fully. Proper drying is a small but important part of effective stain removal in burnt oak.
What not to do
- Do not soak the wood.
- Do not use steel wool or rough pads.
- Do not apply bleach without knowing the finish.
- Do not ignore a spot test.
- Do not rub aggressively against the grain.
- Do not wax over a stain and hope it disappears.
Preventing Future Stains on Burnt Oak
Prevention is one of the smartest ways to reduce the need for repeated stain removal in burnt oak. Coasters, placemats, felt pads, and routine dusting all help protect the surface. If the wood is in a high-traffic area, a proper protective finish can make a major difference in durability and cleanup.
Humidity control is also important. Burnt oak can react to environmental changes, and excessive moisture may make it more susceptible to staining, warping, or finish breakdown. In homes with fluctuating temperatures, maintaining stable indoor conditions can help preserve the appearance of wood surfaces. This makes future stain removal in burnt oak easier because the finish remains more intact.
Routine cleaning matters too. A simple weekly wipe-down with a dry or lightly damp cloth reduces buildup before it turns into a stubborn problem. For many households, maintaining a regular care schedule means fewer deep-cleaning sessions and fewer emergency stain removal in burnt oak situations.
Prevention tips that really help
- Use coasters under drinks and planters.
- Clean spills immediately.
- Dust regularly with a soft cloth.
- Avoid silicone-heavy polishes unless recommended.
- Keep heat sources away from wood surfaces.
- Check the finish periodically for wear.
When Professional Help Is the Better Choice
Sometimes DIY methods are not enough. If the stain is large, dark, persistent, or located on a valuable piece, professional stain removal in burnt oak may be the best choice. Experts can identify the finish, determine whether the stain has penetrated the wood, and apply restoration techniques that minimize risk. This is especially valuable for antique furniture, custom cabinetry, or high-end flooring.
Professionals often have access to color-matching systems, sanding equipment, safe strippers, and specialized restoration products that are not typically found in households. They can also decide whether spot repair, refinishing, or complete surface treatment will produce the most natural result. In many cases, professional stain removal in burnt oak saves both time and money by preventing further damage.
If you are unsure whether a stain can be treated safely, it is better to ask for expert evaluation than to keep experimenting. A well-timed intervention can preserve the look of the wood and avoid costly replacement. For valuable surfaces, stain removal in burnt oak should be viewed as a restoration task, not just a cleaning task.
Good reasons to call a professional
- The stain keeps returning after cleaning.
- The finish has turned cloudy or patchy.
- The surface is antique or expensive.
- You suspect deep water damage or oxidation.
- You want a seamless color match.
Maintaining the Beauty of Burnt Oak Long-Term
Long-term care makes all the difference. If you want burnt oak to stay rich, elegant, and attractive, build a maintenance routine around gentle cleaning and prompt attention to spills. In practice, stain removal in burnt oak becomes much easier when daily care prevents marks from setting in.
It also helps to refresh protective coatings when needed. Over time, finishes wear down, especially on table tops, floors, and cabinets that see frequent use. A worn finish is more vulnerable to staining, so resealing or refinishing can be a smart investment. This step not only supports stain removal in burnt oak but also protects the wood from future damage.
Finally, remember that wood naturally changes over time. Some darkening, fading, or sheen variation is normal. The goal is not perfection at all costs, but a healthy, well-maintained surface that looks beautiful and ages gracefully. With the right habits, stain removal in burnt oak becomes a manageable part of ongoing care rather than a stressful emergency.
Long-term care reminder
Inspect, clean, protect, and respond quickly. Those four actions keep burnt oak looking its best and reduce the chance that a small mark turns into a major repair. If you want your wood surfaces to remain visually striking, consistent maintenance is essential.
Final Thoughts on Stain Removal in Burnt Oak
Burnt oak offers warmth, depth, and a refined visual appeal that suits modern and traditional interiors alike. Still, its rich finish requires thoughtful care. The most effective stain removal in burnt oak combines prompt action, gentle cleaning, and an understanding of the surface finish. Whether you are dealing with water rings, grease, ink, or deeper discoloration, the right method can make a noticeable difference.
By starting with safe techniques, avoiding harsh chemicals, and knowing when to stop and reassess, you protect the wood while improving its appearance. For stubborn or valuable pieces, professional help may offer the best path to a lasting result. If you are ready to restore your wood surfaces and keep them looking elegant, contact us today to learn more or book your service now.
With the right approach, stain removal in burnt oak does more than fix a mark. It helps preserve the character, value, and beauty of the wood for years to come.